May is super busy at work for me so I haven’t had time to make dinners or write about them. thankfully, it’s almost over and I’ll be able to get back into things in a couple weeks. I hope everyone has a great Memorial Day weekend! (or a regular weekend if you’re not from the US)

Penne Arrabbiata
Arrabbiata means angry in Italian. So that means this dish has some spice, uh oh. No spicy peppers for me, please! I ended up making two versions of the sauce, one without the pepper for me, and one with the pepper for Chris. Also, back again with the arugula. I didn’t like it in the last dish, but this time it’s cooked so I had to see if that made a difference. Cooking the arugula into the sauce and mixing it with everything in the bowl, made it hardly noticeable at all. If you’re not a huge fan of greens, like me, it’s a great way to sneak in some veggies.


Ingredients:
6oz penne
1 red onion
2oz pancetta
1 chili pepper
2 cloves garlic
1 small can diced tomatoes
1 roma tomato
2oz arugula
1/4 cup parmesan cheese
1/2 tsp sugar
Directions:
1. Prep the veggies. Halve, peel, and dice the onion. Mince the garlic. Core, seed, and dice the tomato. Mince the chili pepper. *Be sure to wash hands, cutting board, and knife after the chili pepper*
2.Bring a pot of salted water to a boil. Add the penne to the water and cook for 9-11 minutes until al dente. Drain.
3. Heat a drizzle of oil in a large pan ove medium heat. Add the panchetta and cook for 2-3 minutes, until slightly crispy. Add the onion and as much chili pepper as you like. Cook, tossing for 3-4 minutes, until softened. Add the garlic and cook for another minute, until fragrant. Season with salt and pepper as necessary.
4. Add the roma tomato, the diced tomatoes, and sugar to the pan. Bring to a simmer, and cook for 10 minutes until thickened.
5. Add the drained penne and the arugula to the sauce and toss for 1-2 minutes.
6. Portion into a bowl or onto a plate, and sprinkle with the parmesan cheese. Enjoy!
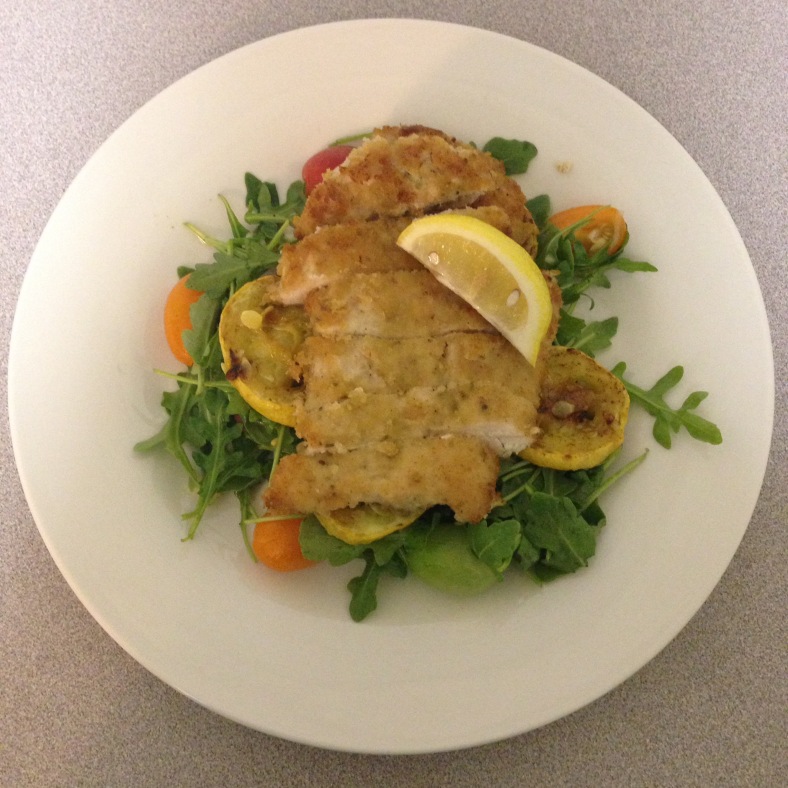
Crispy Chicken Milanese
Chris decided to do another week of Hello Fresh meals so get ready for a few more posts about them. I wasn’t really sure about the salad for this one. I’m not a huge fan of salad to begin with, but this one is arugula, tomatoes, and squash. Those don’t exactly seem like my kinds of food. But the rule is, I have to try it. The chicken was super good, and the sour cream really kept the chicken moist. As expected, I didn’t like the salad. Chris wasn’t a huge fan of it either. If we make the chicken again, we would definitely pick something else to serve as a side.


Ingredients:
2 chicken breasts
4 oz heirloom tomatoes
1 shallot
1 yellow squash
1 lemon
1/2 cup panko
4 Tbsp sour cream
1 tsp Italian seasoning
2 oz arugula
olive oil
Directions:
1. Preheat the oven to 425 degrees. Halve the tomatoes. Halve, peel, and chop 1 tablespoon shallot. Halve the lemon, and cut one half into wedges.
2. Slice the squash into 1/4 inch rounds. Place the squash on a baking sheet with a drizzle of olive oil and a pinch of salt and pepper. Bake for 10-15 minutes, flipping halfway, until golden brown.
3. Butterfly the chicken breasts. Season each breast with Italian seasoning, salt, and pepper. Coat each breast with sour cream. Place the panko in a shallow dish, and coat the chicken in the panko on all sides.
4. Heat some oil in a large pan over medium-high heat. Cook the chicken for 3-4 minutes on each side, until cooke through. Thinly slice the chicken into strips.
5. In a large bowl, combine the shallot, juice of the lemon half (not in wedges), and a large drizzle of olive oil. Season with salt and pepper. Toss in the arugula and tomatoes.
6. Plate the salad, and top with the squash. Place a sliced chicken breast on top, and serve with a lemon wedge.
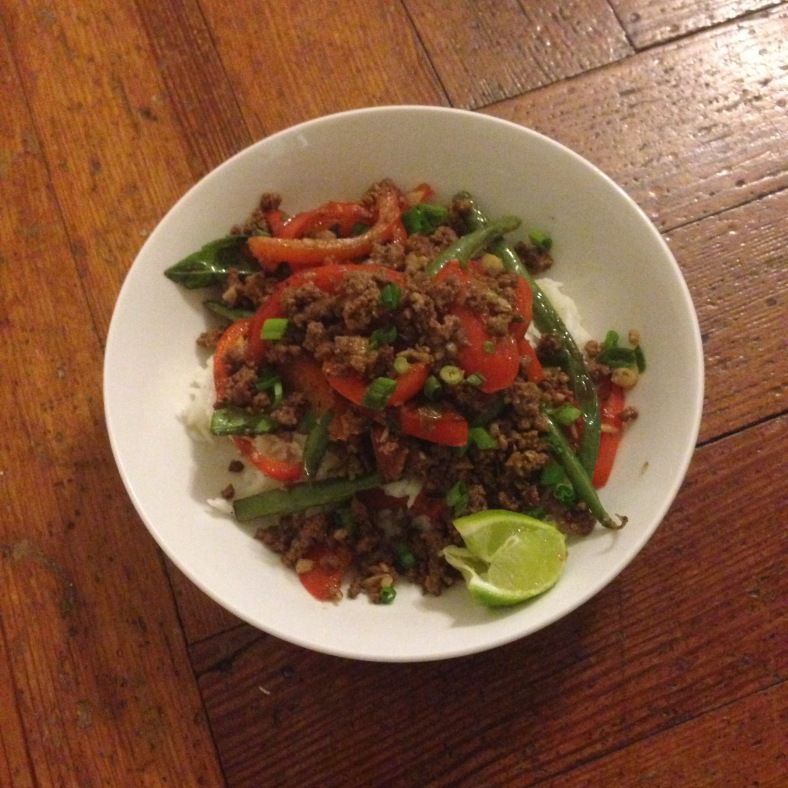
Thai Beef Stir Fry
Chris and I usually try to make the meals from Hello Fresh in the days immediately following when Chris receives them. But this week, we were a little busy and didn’t get to this last one until almost a week after it came in the mail. Surprisingly to us, everything was still good. There was only a small bruise on the bell pepper. We weren’t too sure we were going to like this one. I don’t like spicy, and the coconut rice seemed like a weird flavor to put with these things. So we had a backup dinner plan just in case, which came in handy because I didn’t end up liking it. I ended up packing them into lunches for Chris for the next couple days. It wasn’t his favorite meal, but he didn’t think it was that bad.


Ingredients:
10oz ground beef
2 scallions
1 serrano pepper
1/2 oz basil
2 cloves garlic
1 red bell pepper
6oz green beans
1 lime
3/4 cup basmati rice
1 tsp thai seasoning
3/4 cup lite coconut milk
3/4 cup water
Directions:
1. Prep the veggies. Thinly slice the scallions, keeping the greens and whites separate. Core, seed, and remove the white ribs from the bell pepper, then thinly slice it. Mince the garlic. Thinly slice the serrano pepper, removing the seeds if you prefer less heat. Slice the lime into wedges. Tear the basil leaves into small pieces and discard the stems.
2. Bring the coconut milk, water, and large pinch of salt to a boil in a small pot. Add the rice, cover, and reduce to a simmer for 15 minutes.
3. Toss the green beans in some oil, salt, and pepper. Place on a baking sheet and cook in a 400 degree oven for 15 minutes, until tender.
4. Heat a drizzle of oil in a large pan over medium heat. Add the bell pepper and cook, tossing for 5-6 minutes until soft. Add the scallion whites, garlic, and serrano pepper (to taste) and cook for 1-2 minutes, until softened and fragrant. Season with salt and pepper as necessary.
5. Add the ground beef and thai seasoning to the pan and cook, breaking up the meat, until browned and cooked through. Remove the pan from the heat and stir in the basil.
6. Fluff the rice, and place on a plate or in a bowl. Top the Thai beef stir fry, green beans, and the green scallions. Squeeze a lime wedge over the top. Enjoy!

Zucchini & Parmesan-Crusted Chicken
Another recipe from Hello Fresh. I was really excited about this one cause I love chicken, cheese, and mashed potatoes. I was a little worried about the zucchini and the green beans. Growing up, my mom would always make French-style green beans from a can. I was a bit iffy about trying actual fresh green beans. I don’t eat very many veggies, especially if they’re green, so I was already against the zucchini. Chris was pretty excited about that though, because it was something he wouldn’t have necessarily thought to do and was interested to find out if was good.
I ended up not liking the green beans, but surprisingly I did end up liking the zucchini. I had to scrape it off the top though because I didn’t like the chili flakes that were mixed in. I would leave those out next time I make this and just put them on Chris’s chicken. There was extra green beans, mashed potatoes, and the zucchini mixture, so this could easily make 3 servings instead of just 2.


Ingredients:
2 chicken breasts
1 zucchini
1/4 cup Parmesan cheese
1 tsp chili flakes
12 oz yukon potatoes
6 oz green beans
2 Tbsp milk
1 lemon
1 Tbsp butter
2 tsp olive oil
Directions:
1. Preheat the oven to 400 degrees. Prep the veggies. Peel and cut the potatoes into 1/2 inch cubes. Trim the ends of the green beans. Medium-grate the zucchini into the center of a kitchen towel or cheesecloth. Gather the corners and squeeze over the sink to remove the excess moisture.
2. Place each chicken breast between 2 pieces of plastic wrap and pound until 1/2 inch thick. Season both sides with salt and pepper. Drizzle each chicken breast with olive oil and place on a baking sheet.
3. Toss the Parmesan, chili flakes, and zucchini together. Place a thick layer of that zucchini mixture on the top of each chicken breast. Bake the chicken for 12-15 minutes, until cooked through. Heat the broiler for high and broil the chicken for 2 minutes until golden brown.
4. Place the potatoes in a medium pot with a pinch of salt and cover with water by 2 inches. Bring to a boil and cook for 10-12 minutes. During the last 3 minutes of cooking the potatoes, add the green beans to the pot and cook until crisp-tender. Remove the green beans with a slotted spoon.
5. Drain the potatoes and return them to the pot. Mash the potatoes with the milk and butter until smooth, using a fork or potato masher. Season with salt and pepper.
6. Cut the lemon into wedges. Place the chicken alongside the mashed potatoes and green beans. Squeeze the lemon wedge over the chicken and enjoy!

Ginger Beef Stir Fry
Chris got a free trial of Hello Fresh through his brother, so the next couple posts are going to be the meals we got through them. I want to talk about Hello Fresh for a little bit. Chris signed up online for 3 meals for 2 people. He got to pick which 3 meals he wanted out of a possible 5 meals. You can also choose 4 people, and up to 5 meals a week. Packing and shipping is great. Chris got to pick the day he wanted the food to be delivered. They put ice packs down on the bottom of the box and then place a barrier between the ice packs and your meals. Each meal comes in its own separate box with everything that you need, and most items are already measured out. Each box is labeled so you know which meal it is and all of them come with detailed recipe cards on how to prepare your meal. So far, we were pretty impressed. Preparing and cooking the meal was simple and the directions were very straightforward and easy to understand. With this particular recipe, there was a typo regarding how much Hoisin to use. Hello Fresh emailed Chris that morning letting him know about the mistake and the correct amount to use. The meal was delicious and we got to try something new that we might not have thought of making on our own. I even tried the asparagus, which I didn’t end up liking too much, but at least I tried it.


Ingredients:
12 oz Flat Iron Steak
3/4 cup Basmati Rice
6 oz Asparagus
2 Scallions
2 cloves Garlic
1 Tbsp Ginger
1 tsp Sesame Seeds
1 Tbsp Hoisin
2 Tbsp Soy Sauce
Oil
Directions:
1. In a small pot, bring 1 1/2 cups of salted water to a boil. Add the rice to the boiling water, cover, and reduce to a low simmer for 15-20 minutes, until rice is cooked. Remove from the heat and keep covered until ready to serve.
2. Prep the veggies. Trim and discard the bottom inch from the asparagus and cut into 2 inch sections. Mince the garlic. Thinly slice the scallions. Peel and mince the ginger.
3. Heat some oil in a large pan over medium high heat. Pat the steak dry with paper towels, and season with salt and pepper on both sides. Place the steak in the pan and cook for 2-3 minutes on each side. You want the steak to be browned but not cooked through. Remove from the pan and set aside for a few moments. Then, thinly slice the steak against the grain.
4. In a small bowl, combine the garlic, ginger, soy sauce, hoisin, and 2 Tbsp of water to make the sauce.
5. Add the asparagus and scallions to your pan, and cook for 3-4 minutes until crisp yet tender. Add the sliced steak and the sauce to the pan and cook for an additional 3-4 minutes until the sauce has thickened and the steak has been cooked to your desired doneness.
6. Fluff the rice with a fork and spoon onto your plate. Spoon the stir fry on top of the rice and sprinkle the sesame seeds over everything. Enjoy!

Cheesesteak Egg Rolls
One morning, I was looking through my saved Facebook videos/links to decide what I was going to make for dinner that night. I saw that I had a video for bacon cheeseburger egg rolls, and suggested that to Chris. He said that he had seen something about cheesesteak egg rolls and we should make those instead. So I went off to the grocery store to get all the ingredients. I could not find wonton wrappers down the Asian food aisle, so I ended up getting spring roll wrappers instead. I think those are similar enough, so why not?
Ingredients:
1 package spring roll wrappers
shredded steak
shredded cheese (your choice, I used Provolone)
1 pepper
1 onion
Directions:
1. Cut up the pepper and onion into small pieces.
2. In a medium skillet, pour about 1 tablespoon of oil to cover the bottom, and cook the veggies. Remove them from the pan, and allow them to cool.
3. In the skillet, brown the steak. Season with salt and pepper to taste. Remove from the pan, and allow to cool.
4. Follow the directions on the spring roll wrapper. Lay your spring roll wrapper down, and fill with steak, veggies, and cheese. Then roll the wrapper by starting at the bottom, then folding in the sides, and roll upwards until you reach the end. Then lay down another wrapper and repeat, to form a double wrap.
5. Let your rolls dry for 5 minutes.
6. Fry the rolls for 2-3 minutes, until light golden brown.
7. Drain on a paper towel to absorb the excess oil, and serve.
My Notes:
-My rolls didn’t really brown, but they got crispy on the outside, and that’s how I knew they were done. I’m not really sure why mine didn’t brown, but they still tasted good.
-If you can’t find shredded steak, you can get any kind of thinly sliced steak and just cut them into smaller cubes or long slices.
-I used Provolone cheese. I think Cheddar would be another good option. Use your favorite, make it fun.
-I made tater tots as a side to go along with the cheesesteak part of things, but another good side would be some fried rice to go along with Asian aspect of it all.

Stuffed Shells
Over the weekend, there was an issue with some pipes at Chris’s apartment and he had to stay with me for a couple nights. One day after work, he went grocery shopping and picked up the ingredients to make stuffed shells. I had made stuffed shells once before, with my mom when I was in high school. We always had the cheese stuffed kind. Chris also makes a meat stuffed kind. I was very interested about these, since I had never had them before. So we decided to make both kinds. We made an entire box of shells, and stuffed every single one of them. I have a lot of stuffed shells in my freezer now. We also had leftover meat filling and cheese filling, so Chris decided he would make a lasagna later in the week. Scale down the recipes as needed.
Ingredients:
1 box jumbo shells
4# ground beef
4 cloves garlic
1 onion
2# ricotta cheese
2 eggs
salt
pepper
garlic powder
Italian seasoning
1-2 jars tomato sauce
1# shredded mozzarella
Directions:
Shells:
1. Start with cold water in a large pot.
2. Pour in the shells and mix with your hand.
3. Cook the shells until they are slightly underdone.
4. Drain, and shock the shells with cold water.
5. Drain again.
Meat Filling:
1. Dice the garlic cloves and the onion.
2. Brown the ground beef with the garlic and onion.
3. Drain excess liquid.
4. Allow to cool before filling shells.
Cheese Filling:
1. Add eggs to ricotta and mix.
2. Season with salt, pepper, garlic powder, and Italian seasoning to taste.
Assembly:
1. Coat the bottom of your pan with tomato sauce.
2. Spoon the mixture into the shells, and place them in the pan.
3. Top the shells with tomato sauce.
4. Sprinkle the shredded mozzarella over the tops.
5. Bake at 350 for 20-25 minutes, until cooked and heated thoroughly.
My Notes:
-Try not to mix the shells while they are cooking, this may cause breakage and unusable shells
-The cheese filling has raw egg, so make sure they are cooked before consuming
-Leftovers can be refrigerated, add some extra sauce when reheating
-Each filling recipe will fill about an entire box of shells

Garlic Chicken Thighs
One day while scrolling through Facebook, I had seen this video that one of my friends had shared. It led me to the recipe website where I was excited to learn I had almost all of the ingredients. Another dinner where I already had all the ingredients! Well, almost all of the ingredients. I did have to go out and buy the chicken thighs. But Chris was going to be so proud! Shocked that we had all the ingredients to make this dinner, he confirmed that we actually did have all the ingredients, and then he was proud.
You do need an oven-proof skillet to make this though. Luckily, Chris has an obsession with cast iron and I used his skillet.
Ingredients:
4 bone-in chicken thighs
salt and pepper, to taste
1 Tbsp butter
4 cloves garlic, minced
2 tsp Worcestershire sauce
———————-
zest of 1 lemon
3 Tbsp lemon juice
1/2 tsp sugar
1 tsp dijon mustard
1/2 tsp salt
2 Tbsp heavy cream
Directions:
1. Trim excess fat and skin around the chicken thighs. Rinse them, and pat dry.
2. Season chicken thighs with salt and pepper on all sides.
3. Heat your oven-proof skillet over medium-high heat. Add the butter and melt.
4. Add the chicken thighs, with the skin side down. Cook for about 3 minutes, until the skin is brown and crisp.
5. Flip the chicken thighs over and cook for about 2 minutes.
6. Turn off the heat and remove the chicken thighs from the pan.
7. Add the garlic and Worcestershire sauce to the pan, and mix around.
8. Return the chicken thighs to the pan, with the skin side up.
9. Place the pan in the oven, and bake at 400 for 25-30 minutes. Make sure the chicken thighs are thoroughly cooked.
10. Remove from the oven, and remove the chicken thighs from the pan.
11. Over medium-high heat, add the lemon zest, lemon juice, sugar, mustard, salt, and cream. Combine all ingredients together, and simmer for 2 minutes.
12. Return the chicken thighs to the pan, and allow to simmer for 2 minutes.
13. Serve the chicken over a bed of rice and spoon additional sauce on top, if desired.
My Notes:
-I started the rice when the chicken went into the oven and it was done about right on time
-If you don’t want rice, pasta or noodles would be great options as well
-When making the lemon sauce, adding the juice and the cream make the sauce look separated/curdled. Just keep stirring and the sauce will come together.

Chicken Quesadillas
I’ve been trying to get better about using ingredients that we already have in the house instead of always buying new things for whatever I’m making. I was super excited that I had all of these ingredients. There were some tortillas from when we made burritos a while ago, there’s always cheese and sour cream, and there’s usually some chicken in the freezer. But if I didn’t, it’s a super cheap trip to the grocery store anyway.
Ingredients:
flour tortillas
2 chicken breasts
shredded cheese (your choice, I used cheddar)
sour cream, if desired
Directions:
1. Season and cook the chicken as desired. I used some adobo seasoning and chipotle chili powder.
2. Slice the chicken into strips.
3. Fill half the tortilla with the chicken strips and cheese, and fold the other half of the tortilla over the top.
4. Heat in the skillet until the cheese is melted.
5. Cut into quarters and serve with a side of sour cream.
My Notes:
– I only had cheddar cheese in the house, but usually I use a mixture of cheddar and monterey jack
-I used about half a breast per quesadilla, so this recipe would make 4 quesadillas
-When building your quesadilla, putting cheese down on the bottom and on top of the chicken will help the two sides of the tortilla stick together
-You can also bake the quesadillas instead of using a skillet. Preheat the oven to 375 and place the quesadillas on a baking sheet. They should be done in 5-10 minutes.
